I have built my (DIY Autotune) stim and V3 board up to the first testing stage (power circuit testing) and I can't get 5 volts on the 40 pin processor socket (pins 1, 20 &31). I have followed the trouble shooting guide up to the point of lifting the componants. I have checked componant pressence and orientation 3 times on 3 different occasions. I have washed the board in Tickpur brand PCB flux cleaner. Before I start lfting componants I thought I'd post up my symptoms and see what you good people can suggest. This is what I know from testing with a multi meter:
1, My battery has 9.41 volts
2, Pin 1-19, 34, 36, 37, on the DB-37 have 2.4 ohms to ground when connected to the stim
3, Pins 31 & 32, on the DB-37 have approx 8.9v when connected to the stim
4, Pin 28 on the DB-37 has 9.41 when connected to the stim
5, The rest have zero or <300 mV
5, Pins 1, 20 & 31 on the processor socket have 58.3 - 58.7 mV
6, Pins 2, 19 & 32 on the processor socket have 2.4 ohms to ground when connected to the stim
7, FET U5: Leg nearest DB-9 has 0.0 V & 10.8 Kohm (stable), the middle leg has 0.0 V & 2.4 ohms, the leg nearest the DB-37 has 0.1mV and a reducing resistance in mega-ohms.
Any help or comment greatfully recieved,
Andy
Stage one testing fail - Please help
Forum rules
Read the manual to see if your question is answered there before posting. Many users will not reply if the answer is already available in the manual.
If your question is about troubleshooting, configuration, or tuning, you MUST include your processor type (MS-I or MS-II) and code version in your post. If your question is about PCB assembly or modifications, you must also include the main board version number (1.01, 2.2 or 3.0).
If you have questions about MS1/Extra or MS2/Extra code configuration or tuning, please post them at www.msextra.com Such questions posted here will be moved to: a temporary MSextra sub-forum, where they will be removed after 7 days
The full forum rules are here: Forum Rules, be sure to read them all regularly.
Re: Stage one testing fail - Please help
Check all solder connections for cold solder joints.
I would recommend a wall wart. Instead of using a 9v battery for power.
I would recommend a wall wart. Instead of using a 9v battery for power.
Re: Stage one testing fail - Please help
When you were building the board did you do the testing at Step 23 (the voltage tests), or are you now testing after completion of the board?, never mind I reread the post. So you are at step 23.
U5 is the 5V voltage regulator. When checking the legs against ground you should get leg-1 Stim voltage, leg-2 is ground, leg-3 should be 5V +/- a little.
You say you have ~8.9V on pin 31,and 32 of DB37. Pin 31 is part of the IAC stepper drive, and pin 32 is part of INJ-1 output, neither should have voltage at this point. Sounds like you have a bridged solder joint somewhere.
Pin 28 on DB37 is the +12V supply for the MegaSquirt, you should have Stim voltage at this pin.
Pins 2, 19, 32 should be ground, and zero ohms to ground.
Check the soldering looking for bridges and cold joints. I am not familiar with the flux cleaner you mentioned, I have been using 91% isopropyl and acetone (not at the same time).
Check and get back to us.
Rusty

Re: Stage one testing fail - Please help
Thanks for all the suggestions
I checked for cold (dry) joints under a 10x magnifying scope and found a few suspect looking ones (excess solder or maybe too little solder, particularly matt looking ones) but nothing that screamed out at me. I remade about 15 joints on various elements inc the DB-37, Chip holder and some caps and diodes. I did notice all of the joints looked a little "pickled" on the surface - probably from the flux cleaner.
If I had to guess what I'd done wrong I'd guess I've overheated one of the early components. It took me a little while to work out that I had to "wet" the tip with solder to get a quick joint.
If I've got stim voltage on pin 36, where will it appear next? It’s not on either pin or the MOV or the FET.
Keep them coming, I really don’t want to start lifting components.
Cheers, Andy.
Re: Stage one testing fail - Please help
So the board is fully built out?
2 quick questions
Does the battery last for only a short time, and does U5 get warm to the touch?
2 quick questions
Does the battery last for only a short time, and does U5 get warm to the touch?
Re: Stage one testing fail - Please help
No the board is at step 23.
The battery has lasted about 2 hours of diagnostics so far and is at 9.38 volts. teh fet doesn't get hot even after 1/2 an hour.
Thanks, Andy.
The battery has lasted about 2 hours of diagnostics so far and is at 9.38 volts. teh fet doesn't get hot even after 1/2 an hour.
Thanks, Andy.
Re: Stage one testing fail - Please help
What stim are you using?
it almost sounds like you are not getting stim voltage to leg 1 of U5
it almost sounds like you are not getting stim voltage to leg 1 of U5
Re: Stage one testing fail - Please help
I'm using the standard megastim v2.2.
You're right though, I haven't got stim voltage at the FET or even the MOV (which I believe is before the FET)?
Latest info: I checked the 2 poly fuses and have got continuity (3.4 ohms) on both.
You're right though, I haven't got stim voltage at the FET or even the MOV (which I believe is before the FET)?
Latest info: I checked the 2 poly fuses and have got continuity (3.4 ohms) on both.
Re: Stage one testing fail - Please help
OK try this
ON the bottom of the board I believe there are two small jumper pads S12 and S12C. What voltage do you get from each of these to ground.
ON the bottom of the board I believe there are two small jumper pads S12 and S12C. What voltage do you get from each of these to ground.
Re: Stage one testing fail - Please help
I couldn't find S12c but S12 has 4 - 10 mV. Wierdly when I first tested it it showed 9.5 mv but droped to 4 mV over time.
So I disconnected and reconnected the stim an rechecked. It started at 30 mV and quickly dropped to 0 mV before climbing back to 7.2 before dropping back to 0.4 mV. It then climbed to 1.6 mV before fluctuating around the 1 mV mark. This is all within the space of a minute.
So I disconnected and reconnected the stim an rechecked. It started at 30 mV and quickly dropped to 0 mV before climbing back to 7.2 before dropping back to 0.4 mV. It then climbed to 1.6 mV before fluctuating around the 1 mV mark. This is all within the space of a minute.
Re: Stage one testing fail - Please help
The 9v battery is getting weak. That is why you need to get a wall wart.Raw wrote:I couldn't find S12c but S12 has 4 - 10 mV. Wierdly when I first tested it it showed 9.5 mv but droped to 4 mV over time.
So I disconnected and reconnected the stim an rechecked. It started at 30 mV and quickly dropped to 0 mV before climbing back to 7.2 before dropping back to 0.4 mV. It then climbed to 1.6 mV before fluctuating around the 1 mV mark. This is all within the space of a minute.
Re: Stage one testing fail - Please help
Were you still getting about 9V on pin28?Raw wrote:I couldn't find S12c but S12 has 4 - 10 mV. Wierdly when I first tested it it showed 9.5 mv but droped to 4 mV over time.
So I disconnected and reconnected the stim an rechecked. It started at 30 mV and quickly dropped to 0 mV before climbing back to 7.2 before dropping back to 0.4 mV. It then climbed to 1.6 mV before fluctuating around the 1 mV mark. This is all within the space of a minute.
IF you look on pg6 of the schematics, HERE http://www.megamanual.com/ms2/pcb.htm
you will see S12, and S12C are on either side of D10.
12RAW is connected to PIN28, and if you had 9V on PIN28, you should get 9V on S12.
Still sounds like a solder bridge. Can you post some pictures of the solder side of the DB37?
Re: Stage one testing fail - Please help
Yes I'm still getting battery voltage (9.35) on pin 28. I'll post some pics later. Thanks.
Re: Stage one testing fail - Please help
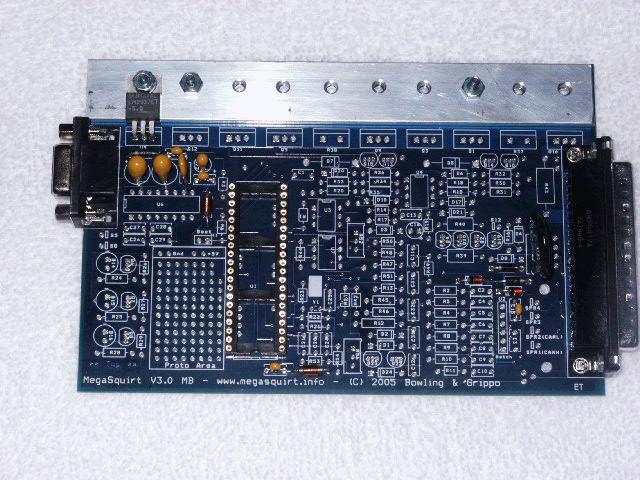
The components go on the other side.
I am not sure if it matters electrically, but the endplates wont fit.
Rusty
ON EDIT: It won't work electrically either, the pins won't line up on the processor or other multi pin ICs
Re: Stage one testing fail - Please help
LOL, you're shitting me?
Re: Stage one testing fail - Please help
SorryRaw wrote:LOL, you're shitting me?
Look here http://www.megamanual.com/ms2/heat_sink2.JPG You can read the component names on the same side the compnents go.
Rusty
Re: Stage one testing fail - Please help
Yeah, I twiged on the inverted processor socket. Looks like I'm going to have to start again anyway!
So the questions now are:
1, will this be the cause of my +5v problem?
2, will I have damaged the board or componants during testing?
So the questions now are:
1, will this be the cause of my +5v problem?
2, will I have damaged the board or componants during testing?
Re: Stage one testing fail - Please help
1, You had the in and out of the voltage regulator reversed. So yes, Did it live? Maybe.Raw wrote:Yeah, I twiged on the inverted processor socket. Looks like I'm going to have to start again anyway!
So the questions now are:
1, will this be the cause of my +5v problem?
2, will I have damaged the board or componants during testing?
2, I don't think so. The board should be ok, Voltage regulator?? Maybe?? Cheep part anyway. other parts were probably not getting any real voltage, and with the DB37 upside down, hard to tell what the pins translate to, ( I am at my 'day' job right now).
the pain is going to be removing the DB9 and DB37. I have never had much luck with solder wick when doing more the 3 or 4 pins. Best bet is a De-soldering iron with a squeeze bulb on it. The tip is hollow and goes around the pin. Squeeze the bulb, put tip around pin for a second or two, release bulb, and most of the solder should be sucked out. You can do a 60pin ECU connector in 15 minutes easy, so the DBs should be pretty easy that way. The other parts should come out pretty easy, but getting them back in might be hard.
Rusty